Application for external roof insulation

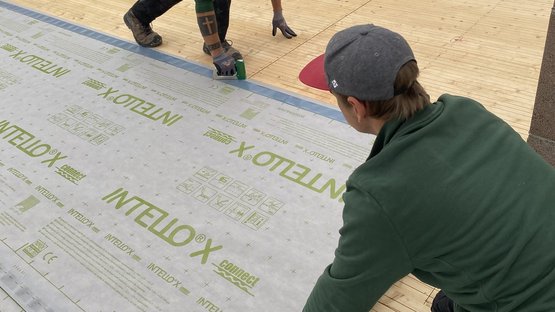
1. Install the membrane
Roll out the membrane and fasten it using galvanised staples that are at least 10 mm (⅜″) wide by 8 mm (⁵⁄₁₆″) long at intervals of 10-15 cm (4″-6″) in the overlap area in a manner that protects against moisture entry. If exposure to the elements is planned, staples installed in open areas of the membrane should be taped over.
Install the membrane leaving an additional 4 cm (1⅝″) overlap at adjacent building structures so that an airtight bond can be applied here subsequently.

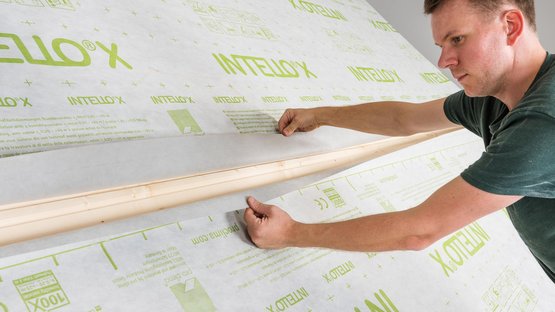
2. Overlap the membranes
Allow for an overlap for at least 10 cm (4″) between the membranes and ensure that the upper membrane lies over the lower membrane in the finished overlap to create a waterproof arrangement. The marking that is printed onto the membrane will serve as a guide here.
2. Overlap the membranes
Allow for an overlap for at least 10 cm (4″) between the membranes and ensure that the upper membrane lies over the lower membrane in the finished overlap to create a waterproof arrangement. The marking that is printed onto the membrane will serve as a guide here.

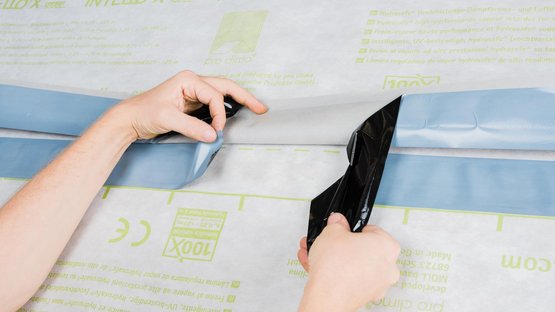
3. Stick the overlap
Stick the membrane overlap using INTELLO X connect with two integrated self-adhesive strips. Rub firmly using the PRESSFIX application tool to secure the adhesive bond.
3. Stick the overlap
Stick the membrane overlap using INTELLO X connect with two integrated self-adhesive strips. Rub firmly using the PRESSFIX application tool to secure the adhesive bond.

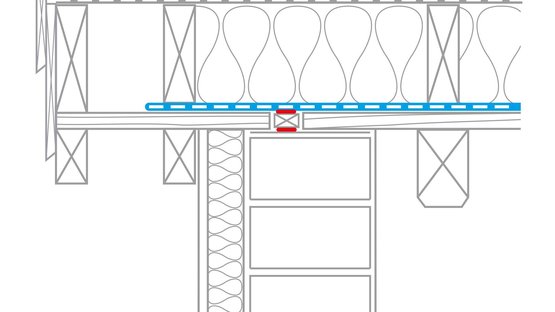
4. Joint at bargeboard
Interruption of the wood sheathing at the top of the wall cap, which has a layer of mortar applied to it. A roof lath is adhesively bonded to the wall cap with ORCON F along its entire length. Sealing of the membrane to the roof lath using ORCON F.
4. Joint at bargeboard
Interruption of the wood sheathing at the top of the wall cap, which has a layer of mortar applied to it. A roof lath is adhesively bonded to the wall cap with ORCON F along its entire length. Sealing of the membrane to the roof lath using ORCON F.

5. Joint at bargeboard, alternative 1
Butt joint between wood sheathing and last rafter. The membrane passes through the butt joint and onto the inside of the wood sheathing and is stuck to the top of the wall cap using ORCON F.
5. Joint at bargeboard, alternative 1
Butt joint between wood sheathing and last rafter. The membrane passes through the butt joint and onto the inside of the wood sheathing and is stuck to the top of the wall cap using ORCON F.

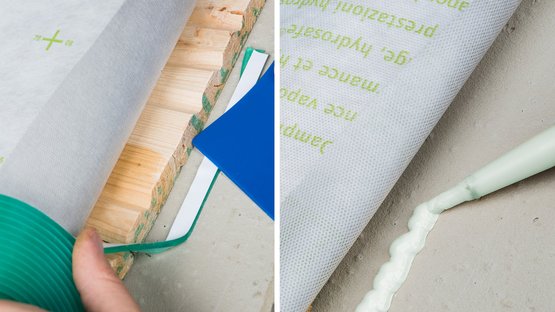
Example: Joint at wall cap
Sealing to the continuous smooth plaster finish on the wall cap can be carried out using the ORCON MULTIBOND adhesive sealant (applied from a roll) or in liquid form using ORCON F (or, alternatively, ORCON CLASSIC). Any loose material on the subsurface should be removed beforehand.

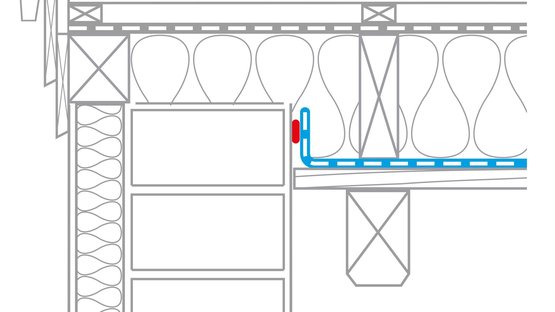
6. Joint at bargeboard, alternative 2
In the case of a plastered gable wall, bond the pro clima membrane to the plaster using ORCON F.
6. Joint at bargeboard, alternative 2
In the case of a plastered gable wall, bond the pro clima membrane to the plaster using ORCON F.

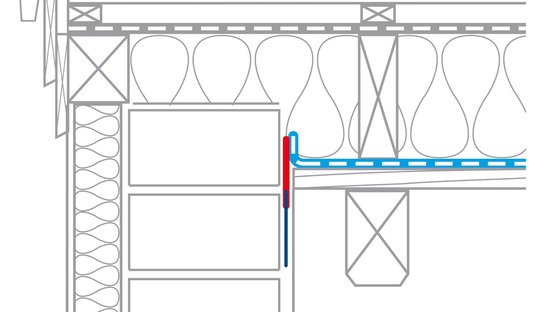
7. Joint at bargeboard, alternative 3
If there is no layer of plaster, affix CONTEGA PV to the wall using adhesive sealant and bond the membrane to the adhesive strip. At least 1 cm (⅜″) width of the fleece must be embedded into the middle of the layer of plaster.
7. Joint at bargeboard, alternative 3
If there is no layer of plaster, affix CONTEGA PV to the wall using adhesive sealant and bond the membrane to the adhesive strip. At least 1 cm (⅜″) width of the fleece must be embedded into the middle of the layer of plaster.

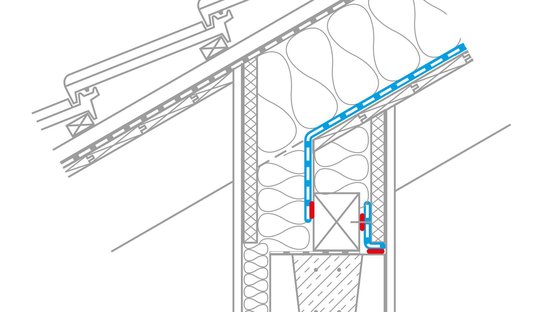
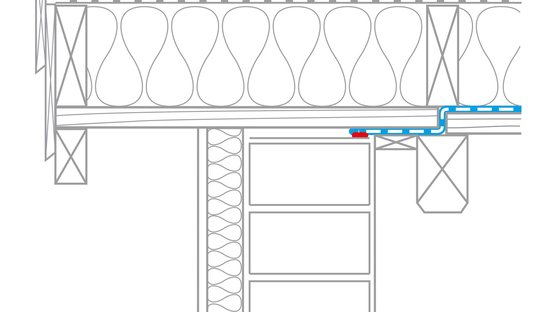
8. Eave joint with exposed rafters without rafter tails
Stick the membrane to the wallplate in an airtight manner using ORCON F. Seal the joint between the wallplate and the ring beam in an airtight manner using a strip of vapour control membrane (e.g. INTELLO conneX) and ORCON F.
8. Eave joint with exposed rafters without rafter tails
Stick the membrane to the wallplate in an airtight manner using ORCON F. Seal the joint between the wallplate and the ring beam in an airtight manner using a strip of vapour control membrane (e.g. INTELLO conneX) and ORCON F.

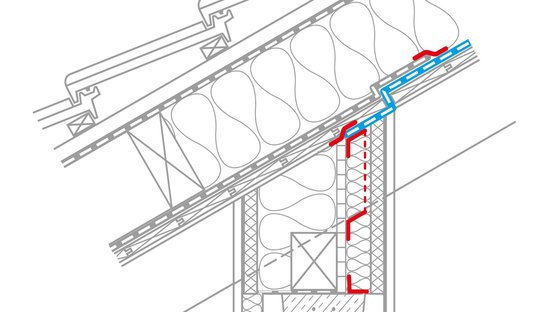
9. Eave joint with exposed rafters with rafter tails
Install an upright positioning board made of wood-based panel on the inside between the rafters and bond it to the ring beam and the rafters using TESCON PROFECT. If necessary, apply ORCON F underneath the tape in the case of rough concrete. Interrupt the sheathing above this positioning board and tape the membrane to this board.

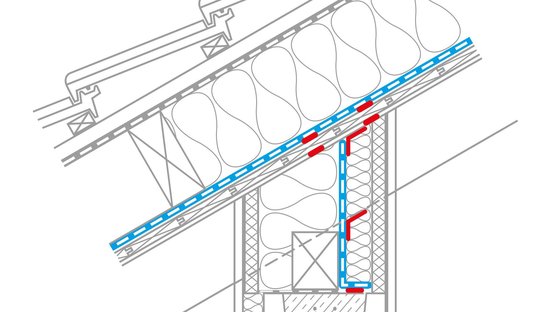
10a. Eave joint with exposed rafters with rafter tails, alternative
Install a strip of vapour control membrane, e.g. INTELLO conneX, on the inside between the rafters and bond it to the ring beam and the rafters using TESCON PROFECT. If necessary, apply ORCON F underneath the tape in the case of rough concrete. Above the vapour control strip, create seals between the sheathing and both the rafters and the membrane using double strips of adhesive.

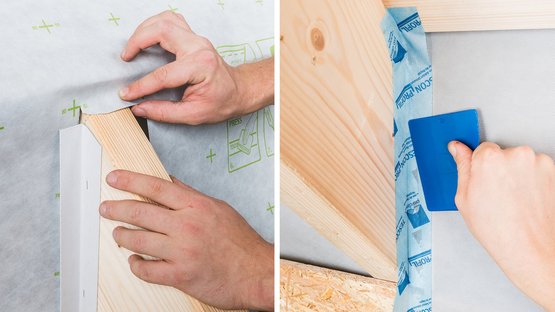
10b. Sheet joint in corners with support
The TESCON FIX mounting bracket strip is stuck to the subsurface using one of the two independent strips of adhesive tape that are fitted to it. The vapour control sheet is put in place and then stuck to the second independent strip of adhesive tape in an airtight manner (working from the inside). The (exterior) bracket strip provides resistance pressure when pressing with the PRESSFIX tool.
Airtight sealing to the upper side of the rafter is carried out simply by using a length of TESCON VANA.


11a. Sealing around cables
Place a KAFLEX cable grommet over the cable and stick to the membrane. The cable grommets are self-adhesive.
The range includes:
- KAFLEX mono (see photo)
- KAFLEX duo - for 2 cables
- KAFLEX multi - for up to 16 cables
- KAFLEX post - for retrofit installation
11a. Sealing around cables
Place a KAFLEX cable grommet over the cable and stick to the membrane. The cable grommets are self-adhesive.
The range includes:
- KAFLEX mono (see photo)
- KAFLEX duo - for 2 cables
- KAFLEX multi - for up to 16 cables
- KAFLEX post - for retrofit installation

11b. Sealing around pipes
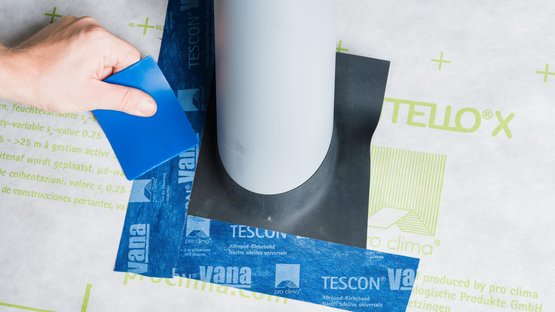
Place a ROFLEX pipe grommet over the pipe and stick to the membrane using TESCON VANA.
11b. Sealing around pipes
Place a ROFLEX pipe grommet over the pipe and stick to the membrane using TESCON VANA.

12. Quality assurance
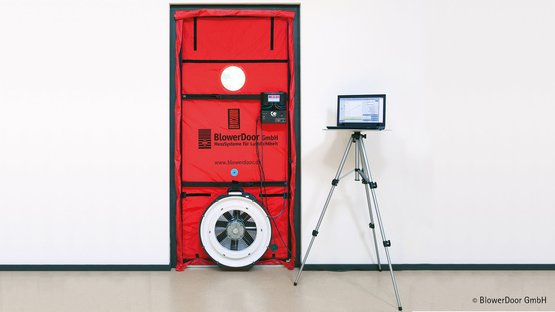
If all joints have been implemented in an airtight manner, the thermal insulation structure will be reliable and permanent. Testing of the airtightness with a BlowerDoor test is recommended for quality assurance purposes.
12. Quality assurance
If all joints have been implemented in an airtight manner, the thermal insulation structure will be reliable and permanent. Testing of the airtightness with a BlowerDoor test is recommended for quality assurance purposes.

