Installation steps

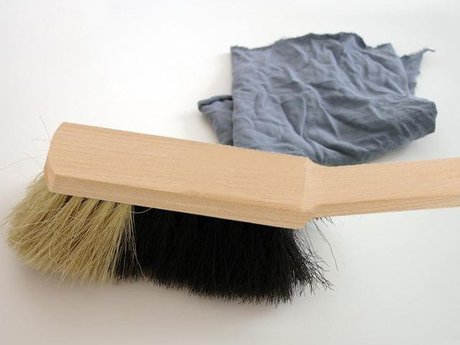
1. Preparation
Subsurfaces must have sufficient stability and be dry, level and free of dust, silicone and grease. Brush off subsurfaces; if necessary, clean with a vacuum cleaner and wipe down. If necessary, apply a coat of TESCON PRIMER in the case of crumbling plaster or very fine dust.
1. Preparation
Subsurfaces must have sufficient stability and be dry, level and free of dust, silicone and grease. Brush off subsurfaces; if necessary, clean with a vacuum cleaner and wipe down. If necessary, apply a coat of TESCON PRIMER in the case of crumbling plaster or very fine dust.

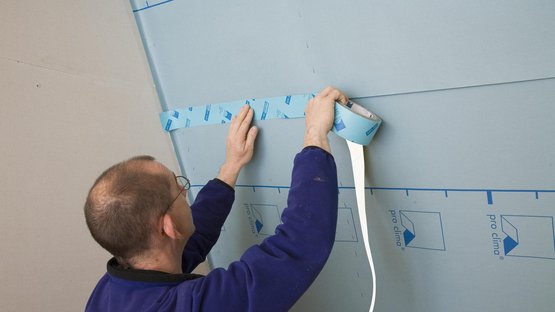
2. Taping of membrane overlaps
Centre UNI TAPE on the overlap, roll it out and stick the membranes gradually. Rub firmly using the PRESSFIX application tool to secure the adhesive bond.
2. Taping of membrane overlaps
Centre UNI TAPE on the overlap, roll it out and stick the membranes gradually. Rub firmly using the PRESSFIX application tool to secure the adhesive bond.

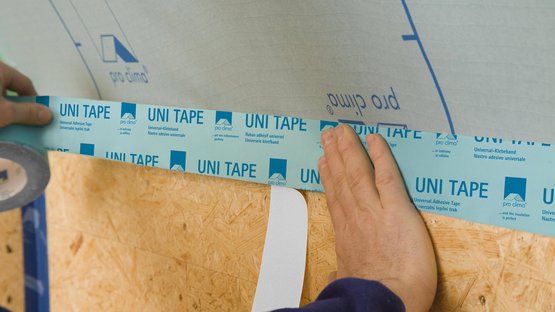
3. Interior joints
To implement airtight joints between vapour control membranes and smooth, non-mineral subsurfaces such as wood-based panels or planed wood, centre UNI TAPE on the joint and gradually stick it in place.
3. Interior joints
To implement airtight joints between vapour control membranes and smooth, non-mineral subsurfaces such as wood-based panels or planed wood, centre UNI TAPE on the joint and gradually stick it in place.

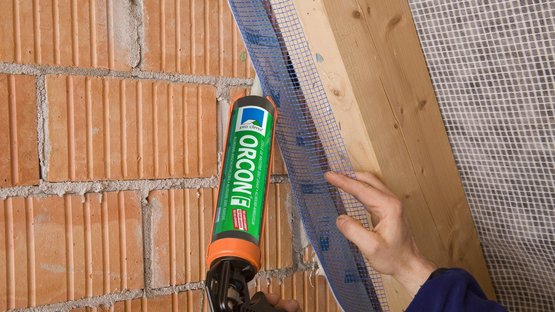
4a. Detail solution for plaster-sealing tape
Creating defined plaster joints using CONTEGA PV: Fix fleece to the masonry at discrete points using ORCON F or ORCON CLASSIC. Please note: there must not be any hollows under the tape.
4a. Detail solution for plaster-sealing tape
Creating defined plaster joints using CONTEGA PV: Fix fleece to the masonry at discrete points using ORCON F or ORCON CLASSIC. Please note: there must not be any hollows under the tape.

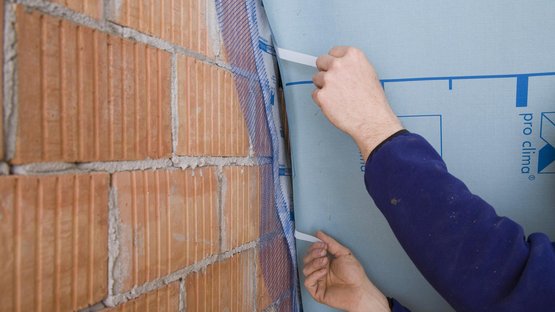
4b. Detail solution for plaster-sealing tape
Guide the vapour control membrane into position. Remove the release film strip from CONTEGA PV and attach the fleece to the airtightness layer using the adhesive strip. Rub firmly using the PRESSFIX application tool to secure the adhesive bond. Ensure that there is sufficient resistance pressure.

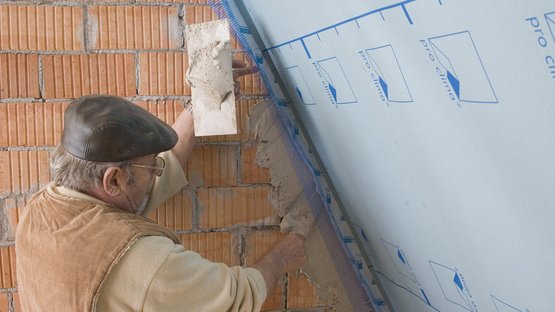
4c. Detail solution for plaster-sealing tape
Apply plaster behind the fleece and reinforcement structure and smooth the plaster. Place the fleece and reinforcement structure onto the plaster and then plaster over them fully. Use a bonding bridge in the case of calciferous plaster.
4c. Detail solution for plaster-sealing tape
Apply plaster behind the fleece and reinforcement structure and smooth the plaster. Place the fleece and reinforcement structure onto the plaster and then plaster over them fully. Use a bonding bridge in the case of calciferous plaster.

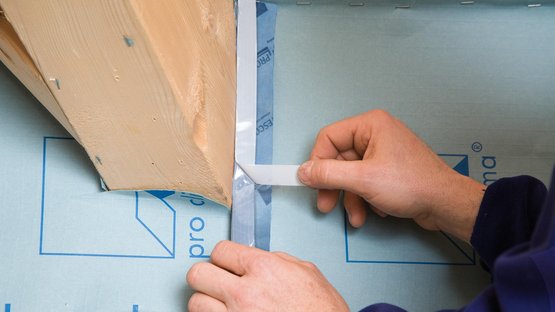
5. Detail solution for corner joints
Corner joints can be implemented using the TESCON PROFECT corner adhesive tape. Remove one strip of the double-divided release film and stick the first side. Then remove the remaining backing strips and stick the second side.
5. Detail solution for corner joints
Corner joints can be implemented using the TESCON PROFECT corner adhesive tape. Remove one strip of the double-divided release film and stick the first side. Then remove the remaining backing strips and stick the second side.

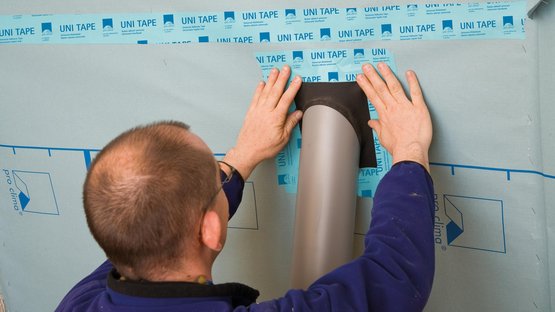
6. Detail solution for pipe feed-throughs
Pull the ROFLEX pipe grommet over the pipe and stick it to the airtightness layer in an airtight manner using UNI TAPE.
6. Detail solution for pipe feed-throughs
Pull the ROFLEX pipe grommet over the pipe and stick it to the airtightness layer in an airtight manner using UNI TAPE.

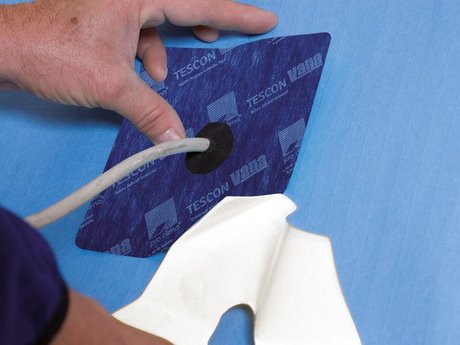
7. Detail solution for cable feed-throughs
Implement cable feed-throughs using KAFLEX self-adhesive cable grommets. Pull the cable through, remove the backing strip and fix the grommet. Rub firmly using the PRESSFIX application tool to secure the adhesive bond. Ensure that there is sufficient resistance pressure.

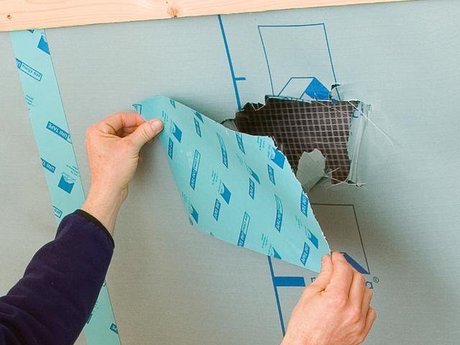
8. Detail solutions for repairs
To repair holes or apply patches, use UNI TAPE XL with a thickness of 15 or 20 cm (~6″ or 8″) or the pre-fabricated TESCON VANA patch. Rub firmly using the PRESSFIX application tool to secure the adhesive bond. Ensure that there is sufficient resistance pressure.
8. Detail solutions for repairs
To repair holes or apply patches, use UNI TAPE XL with a thickness of 15 or 20 cm (~6″ or 8″) or the pre-fabricated TESCON VANA patch. Rub firmly using the PRESSFIX application tool to secure the adhesive bond. Ensure that there is sufficient resistance pressure.

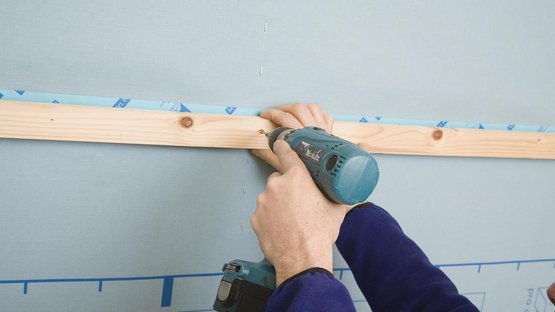
9a. Detail solution for blown-in insulation material
If blown-in insulation material is to be used, secure the overlap taping with a supporting lath. Use suitable vapour control membranes (e.g. DB+).
9a. Detail solution for blown-in insulation material
If blown-in insulation material is to be used, secure the overlap taping with a supporting lath. Use suitable vapour control membranes (e.g. DB+).


9b. Detail solution for blown-in insulation material
Alternative: under certain conditions, the use of perpendicular support strips of tape at maximum intervals of 30 cm (12″) may be sufficient. It is your responsibility to verify this on site.
9b. Detail solution for blown-in insulation material
Alternative: under certain conditions, the use of perpendicular support strips of tape at maximum intervals of 30 cm (12″) may be sufficient. It is your responsibility to verify this on site.

